DIY Paver Sealing Tips: Essential Techniques for a Long-lasting Driveway
A well-maintained driveway isn't just about aesthetics; it's also about protecting your investment. You've probably noticed how dirt, oil spills, and harsh weather can quickly mar the look of your pavers. This is where sealing comes in—it acts as a shield, keeping those elements at bay.
Through extensive research and insights from fellow DIY enthusiasts, we've gathered top techniques that ensure your pavers stay strong and vibrant. Whether you're battling frequent oil spills or harsh weather conditions, effective sealing not only preserves their looks but also saves you from costly repairs down the line.
To effectively seal pavers as a DIY project, first ensure the surface is thoroughly cleaned and allowed to dry for at least 24 hours, avoiding any dirt or dust from being sealed in. After that, choose the appropriate sealer—water-based sealers are recommended for joint sand, and apply it evenly using a sprayer in a circular motion for optimal coverage.

Benefits of Sealing Your Pavers
One of the most critical benefits of sealing your pavers is their enhanced resistance to stains, including substances like oil and grease. This advantage becomes especially invaluable for driveways where spills are common, such as when you're working on cars or handling heavy machinery. Accidental drops of motor oil or other contaminants can damage unsealed stones, leading to long-lasting stains that mar the appearance and can be tough to eliminate. A quality sealant acts as a barrier, ensuring that stains do not penetrate and are easily wiped away.
Sealants provide essential protection against harsh weather conditions, particularly in areas prone to heavy rainfall or snow. Water can seep into unsealed pavements, where it may freeze during colder months. This freeze-thaw cycle causes significant expansion and contraction within the material, often leading to cracks and degradation over time. Each crack opens the door for additional water intrusion, worsening the problem. Sealing your pavers allows them to repel water effectively, mitigating these effects and significantly extending their life.
Moreover, sealing your pavers plays a vital role in maintaining their color and vibrancy.
After several years of sun exposure, unsealed pavers often lose their original luster and fade considerably. Conversely, a high-quality sealant includes UV-resistant properties that shield the surface from the sun’s harmful rays. Such protection helps preserve the rich colors of your driveway over the years. Imagine taking pride in a driveway that retains its stunning hues, standing out beautifully against your home instead of fading into dullness.
Beyond aesthetics and longevity, sealing can also save you money in the long run by reducing maintenance costs associated with repairs or replacements due to neglect or damage.
Understanding these numerous advantages sets the stage for making informed decisions about the proper application methods to ensure optimal durability and performance of your pavers.
Selecting the Right Sealant
Choosing the right sealant is akin to selecting the perfect armor for your pavers—protecting them from the elements while enhancing their natural beauty. Water-based sealants are generally user-friendly, allowing for a straightforward application typically suited for less demanding environments. However, one must weigh their advantages against their limitations. These sealants are less durable than their solvent-based counterparts, which makes them more suitable for low-traffic areas, such as garden paths or patios.
In contrast, solvent-based sealants tend to excel in high-traffic settings. They form a robust shield against wear and tear, maintaining their aesthetic appeal through glossy finishes. Think of these as long-lasting guardians for your driveway—while they may require careful application, the protection they offer during intense daily use can't be overstated.
If you're considering sealing a busy driveway or an entrance that sees a lot of foot traffic, opting for a solvent-based sealant—such as acrylic or polyurethane—is likely going to serve you better in the long run despite its somewhat complicated application process.
Beyond these two categories of sealants, certain features can enhance their performance.
When evaluating potential sealants, it’s essential to inspect the product specifications to ensure they meet your needs. For instance, UV protection is crucial in sunny climates where prolonged exposure can degrade your pavers over time. Likewise, anti-slip properties not only help maintain safety, particularly in regions prone to rain or snow but also give you peace of mind.
| Feature | Importance |
|---|---|
| UV Protection | Protects against sun damage |
| Anti-Slip Properties | Reduces slipping hazards when wet |
| Penetrating Sealant | Strengthens the underlying structure |
It’s worth remembering that some products combine various features, providing excellent versatility for different applications and conditions.
Assessing all these factors will ensure you select a sealant that not only protects your pavers effectively but also prolongs their life and enhances their appearance.
With the right sealant chosen, it's also important to consider how to prepare the area and maintain safety throughout the process. This sets the stage for ensuring your DIY project is as successful as possible.
Preparation and Safety Precautions
Before jumping into paver sealing, it's crucial to understand that the groundwork you lay significantly influences the effectiveness of your sealant as well as your safety. Think of it like cooking; if you don’t prepare your ingredients properly, the dish may not turn out right, or worse, something could go wrong in the kitchen. Proper preparation involves thorough cleaning and careful attention to safety measures, ensuring everything runs smoothly during your project.
Cleaning and Drying the Surface
Firstly, clear the area surrounding your pavers by removing furniture, pots, and any debris that might obstruct your work. Imagine stumbling over a garden gnome while trying to seal your driveway; it simply adds unnecessary challenges! After creating a clear workspace, it’s time to clean thoroughly. Use a pressure washer or a stiff brush to scrub away accumulated dirt, algae, and stains.
Important: A common mistake many make is using soap; avoid this at all costs as soap residues can create barriers that inhibit sealant adhesion.
Once you've scrubbed down everything, it's crucial to dry completely. Allow at least 24-48 hours for the pavers to dry. This isn't just formal; moisture trapped under the sealant can cause efflorescence—a white, chalky residue that appears when moisture escapes through the surface after sealing.
After preparing the surface, we can't overlook safety precautions—it’s essential to protect yourself during this process.
Safety Precautions
To keep safe from potential hazards, start with wearing protective gear including gloves, goggles, and a mask. Consider it akin to preparing for battle; you wouldn’t enter without armor! Solvent-based sealants often release harmful fumes if inhaled for extended periods, so ensure you’re set up in a well-ventilated area. Open windows or doors can help facilitate air circulation, significantly reducing fume concentration around your working space.
Another tip—if possible, schedule sealing work during mild weather conditions. High temperatures or direct sunlight can accelerate drying rates of sealants prematurely but also lead to fumes dispersing less effectively. Thus, choosing an optimal time not only boosts productivity but also enhances safety.
By concentrating on proper preparation and adhering to essential safety precautions, you're taking significant steps towards achieving a long-lasting and effective sealing job for your driveway.
With these foundational steps laid out clearly, it's time to explore the specific tools and materials you'll need for a successful sealing project.
Tools and Materials for DIY Sealing
The tools and materials you choose can significantly influence the quality of your sealing project. Having suitable equipment not only streamlines the process but also ensures that the sealant is applied effectively, providing long-lasting protection for your driveway.
Essential Tools and Materials
-
Pressure Washer: This is an indispensable tool for deep cleaning your pavers before sealing. A good pressure washer can remove dirt, grime, and old sealant residue, ensuring a clean surface for application.
-
Brushes and Brooms: Use stiff-bristled brushes for scrubbing stubborn stains and a broom for sweeping up debris. Both play a critical role in preparing the surface.
-
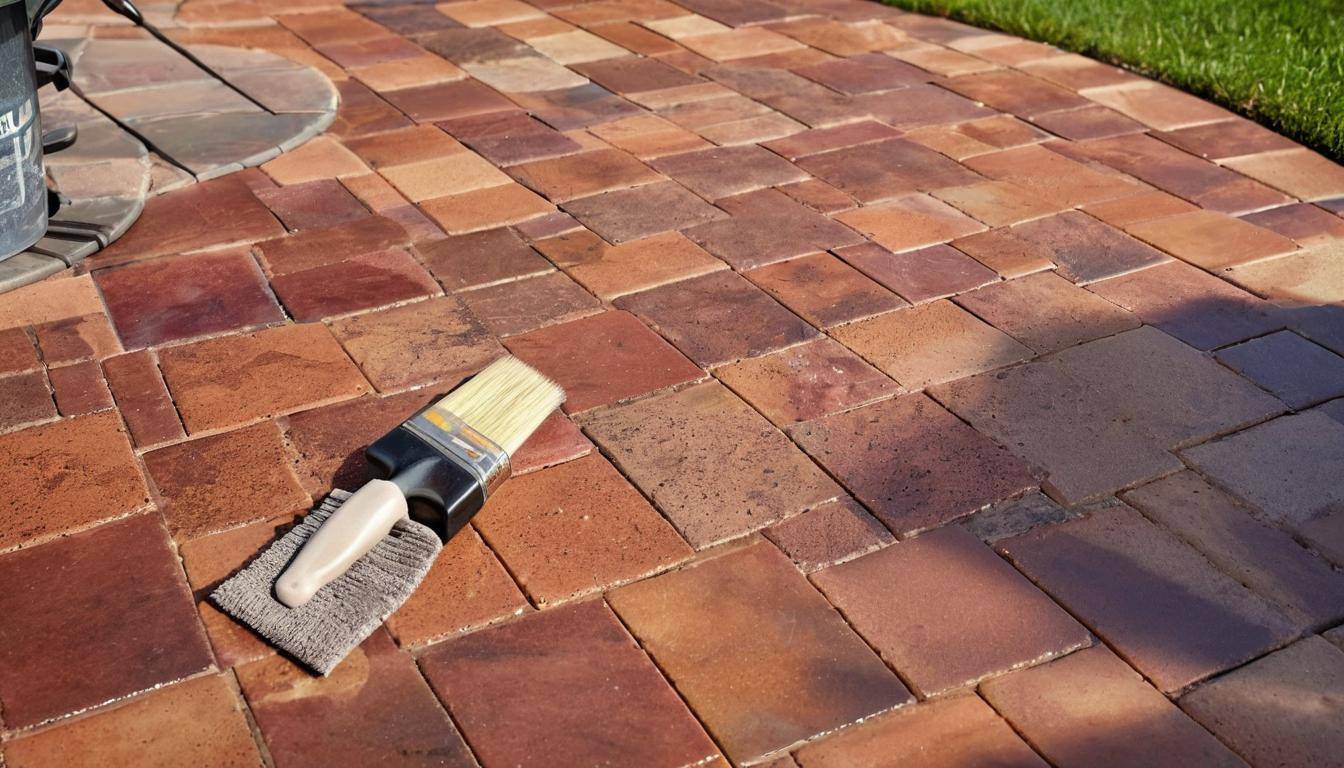
Sealant Applicator: Depending on the type of sealant you're using, you may need different application tools. A garden sprayer is excellent for water-based sealants because it distributes the product evenly. Conversely, a paint roller is more suited for thicker, solvent-based sealants that require a controlled application.
-
Protective Gear: Don't forget to protect yourself! Wear gloves, goggles, and masks to shield your skin, eyes, and lungs from chemicals found in sealants.
Each of these tools serves a unique purpose that contributes to a successful sealing project. For instance, while a pressure washer prepares the surface by maximizing cleanliness, protective gear keeps you safe during the task. It’s easy to underestimate how crucial these small steps can be; however, investing in time spent prepping with proper equipment pays dividends in both longevity and appearance of your pavers.
Always remember that cleanliness is key when it comes to sealing your pavers—any dirt left behind can create imperfections in the finished result.
Additionally, it's vital to clean each tool right after use; this prevents hardening and clogging that can render them useless for future jobs. Imagine finishing a big project only to find out that your sprayer is useless next time because you didn’t rinse it properly. Maintaining your tools extends their life and keeps them in good working condition for future projects.
Assembling the right tools and materials lays a solid foundation for success in your project, ultimately leading you seamlessly into techniques that optimize application methods for stunning results.
Effective Application Techniques
Applying sealant to your pavers is a delicate process, but when done right, it ensures durability and aesthetic appeal. The first step is to test an area. This isn’t just a suggestion; it’s crucial for understanding how the sealant interacts with your specific type of paver. Take a moment to apply a small amount of sealant in an inconspicuous spot. This will give you insight into the color enhancement and finish, allowing you to make adjustments if necessary.
Moving into the application phase, it's paramount to choose the right method—spraying or rolling. If you're opting for spraying, maintain a distance of about 12 inches from the surface and utilize a circular motion. This technique not only helps achieve even coverage but also minimizes drips or pooling, which can occur if you're too close or apply too heavily. Meanwhile, if you're rolling, light and even pressure is key; remember that overdoing it can lead to unsightly streaks and uneven finishes.
Once you've successfully covered the area with the first coat, allow it to penetrate the paver surface thoroughly. A thin coat is sufficient here; applying too much can cause bubbles or peeling in the future. After this initial layer has been applied, be sure to check the drying time indicated by the manufacturer. This is where patience comes into play: ensuring that the first coat dries completely before proceeding with a second application is vital for achieving that long-lasting finish.
Following the manufacturer's instructions on drying time not only respects their guidelines but also plays a critical role in how well your surface will bond with subsequent layers of sealant.
| Step | Importance |
|---|---|
| Test Area | Ensures desired aesthetic and finish |
| Spraying/Rolling | Prevents streaks and pooling |
| First Coat | Allows pavers to absorb sealant |
| Drying Time | Key for successful application |
The techniques outlined above set the stage for maintaining the beauty and integrity of your paver installation. Exploring ongoing care practices will help ensure your driveway continues to impress for years ahead.
Long-term Maintenance Tips
To ensure your pavers remain in excellent condition, regular maintenance is essential. First and foremost, you should conduct routine inspections of your paver surface every few months. Look for signs of wear, cracking, or any noticeable damages. This proactive approach allows you to identify issues before they escalate into larger problems, saving you time and money down the line.
Another key aspect of long-term care is keeping your paver surfaces clean. Regularly sweeping away dirt and debris will prevent them from becoming embedded in the sealant, which can cause premature deterioration. When the time comes for a deeper clean, consider using a gentle pressure washer along with a pH-neutral cleaner to refresh the surface without damaging the sealant or the pavers themselves.
Re-sealing your pavers every two to three years is crucial for maintaining their longevity, especially with varying traffic levels and exposure to weather elements. However, being vigilant about spot-treating any stains or damage as soon as they arise is equally important. If you notice an oil stain from your vehicle or discoloration caused by organic material like leaves or flowers, addressing it swiftly can help prevent long-term staining that might require more intensive cleaning methods later on.
The mantra here is simple: treat small problems quickly to avoid larger headaches in the future.
For more complex issues or if you feel overwhelmed by the sealing process, don’t hesitate to reach out for professional assistance from AZ Clean and Seal. They provide expert services that take the worry out of maintaining your paver driveway while ensuring it continues to look its best over the years.
Establishing a consistent maintenance routine not only preserves your pavers but also enhances the overall aesthetics of your property. Regular care enables you to enjoy a beautiful and functional outdoor space year-round.

