How to Prepare Pavers for Sealing: A Step-by-Step Guide

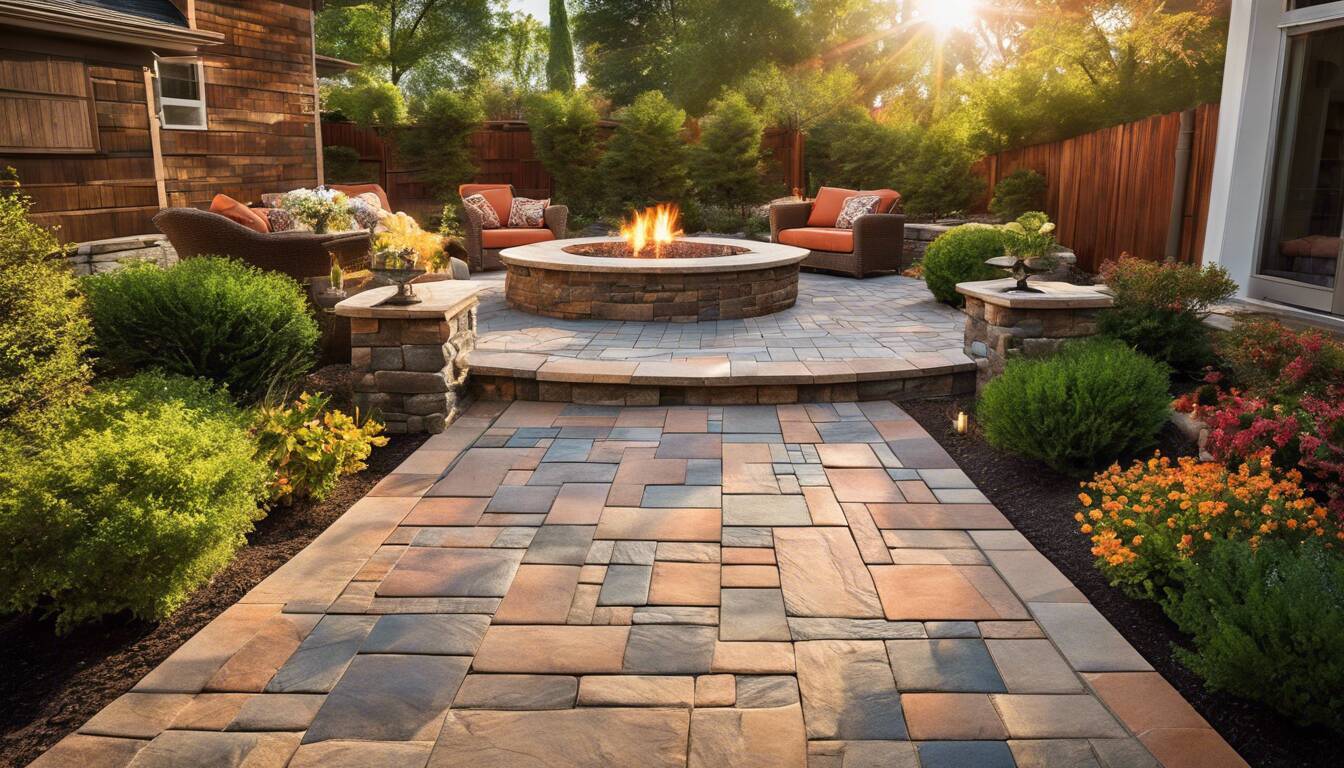
Anyone who loves spending time outdoors values their beautifully paved patio or walkway. But without proper preparation, sealing those pavers can become a homeowner's nightmare, leading to frequent maintenance and more frustration than you'd ever want. Cleaning deeply embedded dirt or dealing with persistent stains are issues that come up often, and if not handled properly, could mean starting from scratch much sooner than you'd prefer.

This is why following detailed, carefully crafted steps is essential. Moving objects like furniture might seem tedious but it's vital for unimpeded work space; sweeping off loose debris helps avoid scratching these surfaces; dampening them lightly ensures a better clean and reduces risk of damage from scrubbing. These are just glimpses into the comprehensive strategies laid out in our guide to preparing your pavers for sealing.

To prepare pavers for sealing, first remove all obstructions like outdoor furniture and cover nearby landscaping with tarps. Next, clear away any moss or weeds using a stiff-bristled brush, saturate the paver surface with water, and scrub with a mild cleaning solution before rinsing. Allow the pavers to dry completely, re-sand the joints with polymeric sand, and finally apply the sealer according to the manufacturer's instructions for optimal results.

Paver preparation tools

Cleaning the Paver Surface

The first action you take in cleaning the paver surface will greatly affect how well the sealer adheres and performs. This process begins by ensuring that you clear any obstructions from your workspace. Moving outdoor furniture and potted plants not only creates an accessible area for cleaning but also protects these items from any overspray or accidental spills of cleaning solutions. Imagine reaching out to wipe down your patio stones only to knock over your favorite plant; that’s an experience you want to avoid!

Once you've cleared the area, it’s time to get serious about removing the dirt that has settled on your pavers over time. Start by sweeping the surface thoroughly with a broom, which removes loose debris, leaves, and dust that can impede your efforts. You may find that stubborn dirt remains embedded in the crevices between the stones. For this, employing a stiff-bristled brush becomes invaluable. While brushing, it's important to gently apply pressure to avoid scratching or damaging the paver surface. Think of it as coaxing out dirt rather than forcing it out.

After you've tackled both loose debris and its more persistent cousin, it’s time to enhance your cleaning strategy further.

Lightly dampening the paver surface before starting a deeper clean will make your job significantly easier. This crucial step helps lift stubborn dirt and moderate stains while preventing residue from sticking too firmly to the stone. To achieve optimal results, prepare a mild cleaning solution using warm water mixed with a detergent specifically formulated for paver cleaning. This potent yet gentle mixture works wonders in breaking down those remnants of organic growth and old cleaning chemicals without jeopardizing the integrity of the materials.

As you proceed with your cleaning, use a mop or cloth soaked in this solution to scrub sections of pavers at a time. Applying this approach allows you to manage smaller areas more effectively, ensuring you are addressing entrenched spots thoroughly while avoiding scrubbing too hard on any one part. Together with warm water's effectiveness, patience becomes an ally in achieving a sparkling finish without blemishes.

Finally, don’t forget to rinse your pavers well after cleaning; this key step ensures no soapy residues linger around waiting to affect your sealant application later on.

With a deep clean accomplished, you’re now well-prepared for the next essential phase in preserving the beauty and longevity of your pavers—removing stubborn stains and invigorating them back to life.

Power Washing and Removing Stains

While general cleaning can eliminate most dirt and grime, pesky stains often cling on no matter what. This is where power washing becomes an essential ally in your quest for clean pavers.

However, using a power washer isn't just about blasting away at the surface; it's about doing it correctly to avoid damaging your paver material while ensuring effective cleaning.

Choosing the Right Power Washer

When selecting a power washer for this task, you’ll want one that offers at least 2000 PSI. This level of pressure strikes a good balance: it’s strong enough to dislodge tough stains like grease or mud without breaking down the surface of the pavers themselves.

I remember the first time I attempted to clean with a lower PSI, thinking I could manage without much force—it was an exercise in frustration watching dirt remain steadfastly rooted.

A nozzle with a wider spray angle, typically around 25 degrees, is ideal for achieving even coverage without causing chips or cracks. The goal here is to use pressure smartly, maximizing cleaning while minimizing potential harm.

Applying Cleaning Solutions

Before you turn on the power washer, consider treating specific stains with effective cleaning solutions. For example, if you’re facing oil stains or tire marks—common issues in driveways—a pH-neutral degreaser works wonders.

Simply follow the product’s instructions; usually, you’ll mix it with water and apply it liberally to the stained areas. Allow it to sit for about 5-10 minutes before rinsing thoroughly. An important tip: keep the nozzle approximately 12 inches from the surface to prevent damage while allowing the cleaner to work effectively.

Another critical area involves dealing with efflorescence—a white, powdery residue often spotted on new pavers. To tackle this efficiently, apply an efflorescence cleaner specifically designed for masonry products. The right solution can dramatically clear up this persistent eyesore, restoring your paver’s natural beauty.

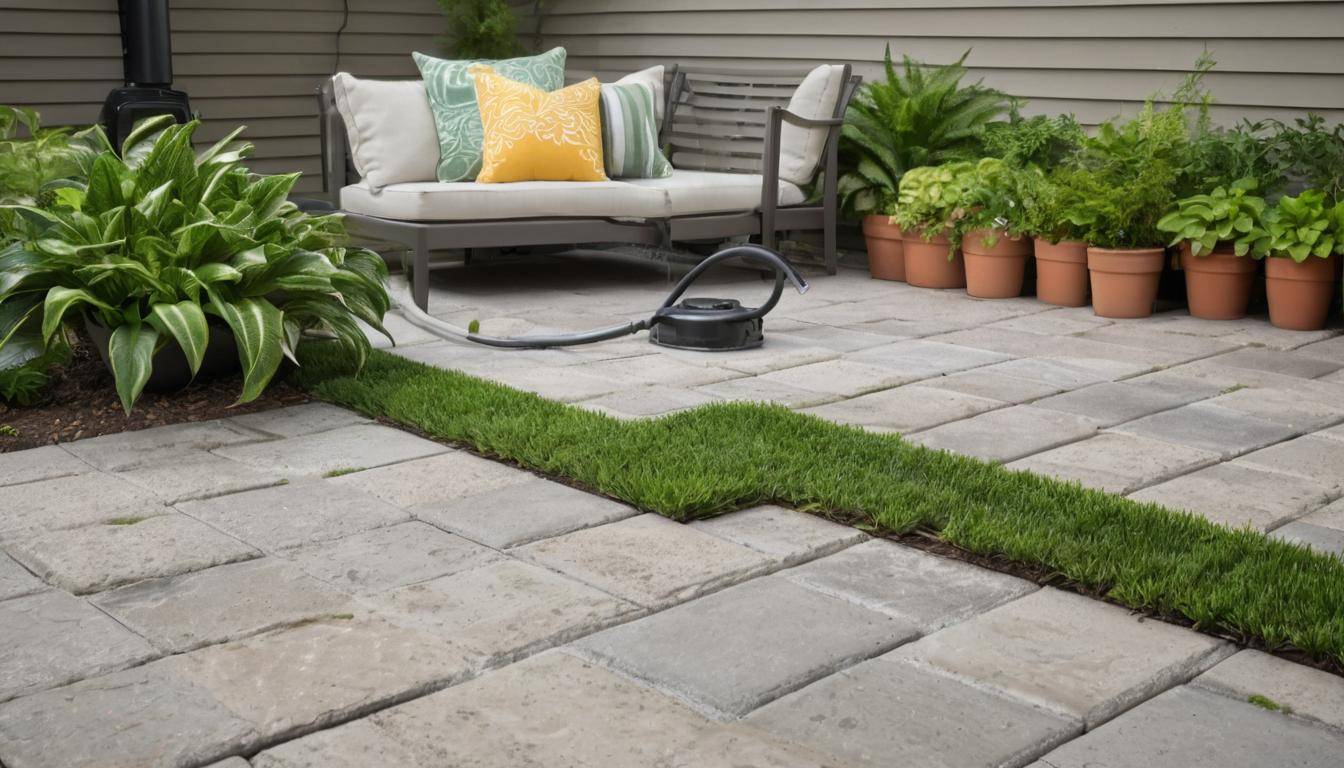
Once you've successfully cleared all visible stains with precision, maintaining the integrity of the joint sand between your pavers becomes essential before applying any sealant.

Sanding and Filling the Joints

Paver joint preparation

The importance of properly filled joints cannot be overstated, as they not only maintain the stability of your paver installation but also contribute significantly to its overall appearance. Filling these joints correctly helps prevent erosion, weed growth, and unwanted pests from taking up residence in your beautiful outdoor space. A solid foundation is essential, and filling those gaps with the right material will keep your pavers looking great year after year.

Choosing Polymeric Sand

When it comes to filling the joints, polymeric sand is often regarded as the industry standard. This special type of sand is designed to harden upon exposure to moisture, creating a secure bond that keeps everything tightly in place. The added benefits? It effectively prevents weeds from sprouting through and acts as a deterrent against pesky insects like ants. If you want a long-lasting solution for your paver joints, choosing polymeric sand will make all the difference.

Applying the Sand

Before you dive into application, ensure that your paver surface is clean and completely dry; this step is critical for optimal results. After confirming that there’s no leftover dirt or debris, pour your chosen polymeric sand generously over the pavers. Gently use a broom to sweep the sand into the joints—don’t rush this step! The key here is to fill each joint deliberately until they're packed firmly but not overflowing. Patience is your friend during this process, as proper filling leads to longer-lasting protection.

Setting the Sand

Once the sand has settled nicely in the joints, it’s time to activate those binding agents by misting the area lightly with water. This crucial step brings the sand to life, causing it to harden and lock into place. However, tread carefully: over-saturating your pavers can wash away all that hard work you've just put in. Aim for a light misting rather than soaking; think of it as giving your pavers a gentle dew rather than a heavy downpour.

By adhering closely to these steps, you pave the way for an aesthetically pleasing and highly functional outdoor area. Next, we will focus on how to tackle those tricky corners and edges where dirt often likes to hide.

Cleaning Edges and Hard-to-Reach Areas

Cleaning paver edges

When preparing pavers for sealing, edges and tight spots can often be neglected, but they require just as much attention as the main surface. Cleaning these areas is crucial because dirt, dust, and organic growth like moss or weeds tend to accumulate there, leading to potential damage over time if left unchecked. One of the most effective tools for this job is a handheld, soft-bristled brush. This tool is designed to delicately sweep away debris without scratching or harming the pavers.

For those smaller, tighter spots that a standard brush simply can't reach, consider using smaller brushes such as old toothbrushes or artist brushes. These can be exceptionally useful for intricate areas where dirt can get trapped—think of the gaps between stones where grime loves to hide. The bristles reach into cracks and crevices effectively, making them indispensable in your cleaning arsenal.

After some experiences cleaning my own pavers, I've found that taking the time to focus on every nook and cranny often makes a noticeable difference in how fresh the whole area looks once sealed.

Additional Techniques

Besides brushing, you might encounter persistent moss or weed growth stubbornly clinging to those hidden corners. One unconventional yet effective method I’ve stumbled upon is the use of a blow torch for targeted weed removal in tight corners. However, caution is key: ensure that surrounding pavers are safeguarded against any accidental burns or damage, as well as being mindful of fire hazards.

When employing the blow torch approach, it’s wise to perform this step on a day with minimal wind and away from flammable materials to mitigate risks.

As you clean these edges and tight spots, keep an eye on the surrounding area. Debris could fly around as you work, which makes it important to frequently remove any loosened particles so they don’t settle back onto your freshly cleaned surface. After meticulously cleaning these areas, ensure that all loose debris is removed to prepare for the sealing step.

The investment in your efforts now will significantly impact the final outcome; every corner scrubbed paves the way for a flawless finish ahead. Let's explore the next steps involved in achieving that perfect seal.

Applying the Sealer

When it comes to protecting your pavers, the application of the sealer is undoubtedly one of the most critical steps. It's the layer that shields your investment from stains, moisture, and harmful elements that can compromise the integrity and appearance of the surface over time. But before diving in, remember that not all sealers are created equal; choosing the correct product designed for specific types of pavers is essential for achieving desired results.

Choosing the Right Sealer

Selecting a high-quality sealer tailored to your specific paver material is paramount. You’ll generally find two categories: water-based and solvent-based sealers. The former is known for being more environmentally friendly, while solvent-based options often provide robust protection against heavier foot traffic or harsher weather conditions. For instance, if you have natural stone pavers, a penetrating sealer might be your best bet as it not only protects but also enhances the stone's inherent color.

Remember to check if the sealer promises stain resistance; products boasting this feature can save you a considerable amount of cleaning effort later on.

Application Process

The application method significantly impacts how well your sealant performs. To start off, you'll want to take a small paintbrush and carefully apply the sealer to the edges of each paver. This gives you better control over those detailed areas, ensuring every nook and cranny receives adequate coverage. Once you've covered the edges, grab a roller brush or low-pressure sprayer to coat the larger surfaces.

Here’s a tip: work in smaller sections rather than too large so you won’t accidentally step on freshly sealed areas while doing your work. This way, you can maintain an even application without worrying about disturbing any still-wet spots.

Ensuring Full Coverage

After covering everything with an initial layer of sealer, it’s crucial to let it do its job and absorb into the pavers properly; typically, this takes around 1-2 hours. When you return for that second coat, look closely; new applications will darken slightly where they're adequately absorbed. However, keep a watchful eye on potential pooling—it’s easy to miss spots where excess sealant has gathered, leading to uneven drying or discoloration.

If pooling happens to occur, make sure to spread it out immediately using your roller brush or another tool. The goal is uniform coverage across your paved surface, which is vital not just for aesthetics but for long-term protection as well.

After ensuring your pavers are well-protected through proper sealing techniques, it's important to explore how to care for them moving forward to maintain their pristine condition and longevity.

Post-Sealing Care and Maintenance

Maintaining sealed pavers goes beyond the initial application of the sealant—it’s a commitment to regular upkeep that keeps your outdoor spaces looking fresh and vibrant. Immediate care is vital, especially in the first few days after sealing. You should absolutely avoid any foot traffic or heavy objects on the surface for at least 24 hours. This crucial step allows the sealer to cure effectively, helping it bond with your pavers and enhancing its protective capabilities.

Immediate Care

During this curing period, treat your newly sealed pavers like delicate artwork. If possible, block access to the area using cones or temporary fencing to prevent accidental damage. After those critical 24 hours, you can begin using the space slowly—just be mindful for the next week or so to ensure everything is settling perfectly.

Once you've navigated through this initial period, it's time to think about long-term maintenance strategies.

Long-term Maintenance

Regular maintenance plays a significant role in prolonging the life of your pavers and maintaining their appearance. Start by incorporating simple weekly tasks; regularly sweeping or hosing down your pavers will help prevent dirt buildup and stains that can mar their beauty over time.

An added layer of care involves inspecting your pavers every few months for signs of wear or damage. Look closely for discoloration, cracks, or any areas where the sand in the joints may have been displaced. Noticing these issues early helps prevent bigger problems later.

In addition to routine cleaning, it’s also important to reapply the sealer every 2-3 years to maintain optimal protection and visual appeal. During this time, ensure you carry out deeper cleanings with appropriate solutions as recommended by professionals like those from AZ Clean and Seal.

In summary, post-sealing care is essential in preserving both the aesthetic charm and durability of your pavers. By adopting proactive cleaning routines and timely inspections, you’ll create an inviting outdoor atmosphere while significantly extending the lifespan of your investment.

Paver Maintenance Tips: Essential Care and Repair for Your Driveway

Keeping your driveway pavers in top shape not only enhances your home's curb appeal but also prevents small issues from becoming costly repairs down the line. When faced with discolored or uneven spots on your driveway, it’s clear that neglect isn’t an option if you want a beautiful and functional outdoor space. Our comprehensive guide helps you maintain and repair your pavers effectively, ensuring they look great year-round without breaking the bank.

We've poured countless hours into gathering expert advice tailored specifically for various types of pavers found in residential driveways. From seasonal cleaning routines to joint maintenance and stain removal techniques, this guide offers step-by-step instructions that empower you to tackle these tasks confidently on your own. With regular attention and care, you’ll find that preserving your driveway’s appeal is simpler than you might expect.

Effective paver maintenance tips include regular cleaning of surfaces with a high-pressure hose or broom to remove debris, addressing weeds promptly using safe removal methods like boiling water or manual pulling, and replenishing joint sand every few years to prevent shifting and weed growth. Additionally, consider sealing your pavers every 2-3 years to protect against stains and weather damage, ensuring your outdoor spaces remain visually appealing and functional.

Well-maintained paver patio

Regular Paver Maintenance

One essential aspect of maintaining your pavers involves yard work. Regular landscaping efforts are crucial in preventing unwanted plant growth from disrupting the surface. Engaging in simple tasks like raking leaves and sweeping debris helps keep your pavers looking clean and prevents stains from decaying organic matter.

Beyond mere appearance, these practices create a more stable environment for your pavers, allowing them to maintain their structural integrity over time. When you clear away leaves and other debris consistently, you set the stage for a hassle-free maintenance routine down the road.

Another significant part of your paver care helps you wash away those pesky winter residues; this brings us to seasonal cleaning.

Seasonal Cleaning

As spring rolls around, it’s a good time to conduct a thorough cleaning of your driveway. Winter can leave behind grime, dirt, and even salt from icy conditions, which can tarnish the beauty of your pavers and lead to deterioration if not addressed promptly.

Utilizing a high-pressure garden hose attachment can effectively help remove these accumulated contaminants without too much elbow grease. However, do remember: you want to ensure your water pressure is not set too high, as an intense blast might dislodge paving stones or damage their surfaces. Striking the right balance in pressure is key to achieving an effective clean.

After you've ensured everything is spick and span, there's one last detail that deserves your attention: joint maintenance.

Joint Maintenance

The next step is to give proper attention to the joints between your pavers. Applying polymeric sand after cleaning plays a vital role in maintaining the stability of both the individual pavers and the driveway as a whole. This special type of sand not only fills the gaps but contains additives that harden when exposed to moisture, acting as a protective barrier against weed growth and helping to minimize shifting caused by environmental factors or foot traffic.

Additionally, it protects against water infiltration that can cause further damage beneath the surface. By taking these steps towards regular maintenance, you'll be investing in a beautiful and long-lasting driveway that enhances your property's overall appeal and functionality.

With these foundational practices in place, it's crucial to focus on how to achieve optimal cleanliness for paver surfaces to ensure their longevity.

Effective Surface Cleaning

One cannot underestimate the value of effective surface cleaning when it comes to preserving the appearance and longevity of your pavers. The process begins with an essential yet straightforward step: removing debris. It's about ensuring that the surface is completely clear for what comes next. Using a stiff broom, sweep away dirt, leaves, and any other loose material. Even small bits of organic matter can lead to staining or attracting insects if left unattended. By doing this, you're not just tidying up; you're preparing your pavers for a more profound clean.

Once you've set the stage with this initial clearing, it’s time to tackle stains that can distract from the elegance of your outdoor space.

Step I - Remove Debris

After you finish sweeping, you'll notice the difference right away—a cleaner surface not only visually enhances your yard but also sets you on the right path toward effective maintenance. Removing debris is crucial; it prevents unwanted moisture retention and additional staining further down the road.

Now, let’s explore how to deal with stubborn stains that can mar the lovely finish of your pavers.

Step II - Stain Removal

For tougher stains like oil or paint spills, specialized paver cleaning detergents serve as invaluable allies. You might be surprised at how effective a simple mixture of dish soap and water can also be—the key is to act quickly before stains settle in too deeply. When applying any type of cleaner, use a soft sponge or cloth; this method minimizes the risk of scratching your paver surface, which can detract from its overall appeal over time.

Remember: Wire brushes may seem tempting for tougher spots, but they do more harm than good by scratching away at your beautiful pavers.

Stain Type Best Cleaning Method
Oil Dish soap and water mix applied with a sponge
Paint Paver cleaning detergent
Food Warm water mixed with mild soap
Rust Treat with lemon juice or white vinegar

With stains now dealt with effectively, we move to one of the more powerful options available in your arsenal: power washing.

Step III - Power Washing

Consider power washing your pavers every three to four years or sooner if you notice excessive grime accumulation. Power washing is an efficient and deep-cleaning method that helps restore the vibrancy of your paver surfaces, making them look fresh once again.

However, it's vital to exercise caution during this process; high-pressure washing can inadvertently cause damage if not done carefully, especially on older or fragile pavers. Always opt for a lower pressure setting initially and adjust as needed—your goal is to cleanse effectively without compromising your hardscape's integrity.

As we transition from cleaning techniques, let’s turn our focus to tackling another common issue that many homeowners face regarding their pavers.

Preventing Weed Growth

Weeds can be a persistent nuisance for any homeowner with a paver driveway. They creep into the joints and can lead to serious structural problems if not addressed.

Managing these unwelcome guests requires a proactive approach that extends beyond simple removal. You can significantly reduce weed growth through effective maintenance strategies.

Applying Polymeric Sand

One of the most reliable ways to tackle the weed problem is by applying polymeric sand in the joints between the pavers. This fine sand hardens when wet, creating a strong bond that keeps the pavers in place and forms an impenetrable barrier against weed growth.

After your routine cleaning, sprinkle fresh polymeric sand into the gaps, ensuring that every joint is filled properly. Once it rains or you lightly mist the surface with water, watch as it solidifies and offers durable protection.

Studies show that using polymeric sand can reduce weed growth by up to 90% compared to traditional sand.

This method strengthens the overall structure by stabilizing the pavers, preventing shifting caused by seasonal weather changes.

Non-Chemical Solutions

If you prefer more natural solutions, there are chemical-free methods available to combat unwanted weeds. One highly effective technique is pouring boiling water directly on the plants; it's an easy and environmentally safe option.

This method utilizes high temperature to kill off stubborn weeds without adversely affecting your pavers or the surrounding ecosystem.

Another meaningful approach combines manual weeding with preventative measures. Regular inspections allow you to address weeds before they multiply. Hand-pulling weeds removes both foliage and roots—preventing regrowth unlike commercial herbicides that may only treat symptoms.

While this DIY method requires more effort, it promotes a healthier environment and keeps harmful chemicals at bay.

It’s essential to weigh all options when selecting a weed management strategy for your driveway. Many people may rely on commercial herbicides for convenience, but considering their environmental impact can guide you toward safer alternatives that won’t harm beneficial insects or nearby plants.

Along with these prevention techniques, maintaining your driveway's integrity is crucial to ensuring its beauty and functionality over time, leading us to explore methods for protecting your surfaces effectively.

Proper Paver Sealing

Freshly sealed pavers

Sealing your pavers is like wrapping a cozy blanket around them; it helps them withstand the elements while keeping them looking sharp. The right sealant acts as a barrier against stains, moisture, and harmful UV rays, which might otherwise cause disintegration or discoloration. By investing a little time into proper sealing, you’re essentially prolonging the life of your driveway and ensuring it remains an eye-catching feature of your home.

Choosing the Right Sealer

Selecting the correct sealant is crucial, as it influences both the longevity and effectiveness of the sealing process. If your driveway comprises concrete pavers, opt for a water-based sealer, which is typically easier to apply and safer for the environment. However, if durability is your top priority—especially in high-traffic areas—solvent-based options are worth considering due to their ability to penetrate deeply and form robust protective layers. Always check what type of paver you have before making your choice; different materials respond better to certain products.

After you've chosen the appropriate sealer, it’s time to prepare your surface for application.

Application Process

The application process begins with a thorough cleaning of the pavers; this step is non-negotiable. Remove any dirt, debris, or previous sealers using pressure washing or an appropriate cleaner to ensure a clean canvas for the new sealant. Once dried, using either a roller or a spray system will help achieve an even application across all surfaces. When you start applying the sealer, remember that less is often more. Aim for a thin and even coat that allows breathability and prevents pooling in low spots.

As you work, keep an eye out for areas that may need special attention—joints between pavers typically absorb sealant differently than flat surfaces nearby. After the first layer has dried completely—typically between 24-48 hours—you can proceed to add a second layer if necessary for added protection.

Did you know that regular sealing can extend the lifespan of your pavers by up to 50%? This statistic highlights just how vital this maintenance step is in safeguarding your investment for years to come.

With paver sealing being so simple yet effective, don't underestimate its significance. It plays a key role in maintaining both aesthetic appeal and structural integrity over time, allowing you to enjoy your outdoor spaces without worry.

Now that we’ve explored sealing techniques, let’s shift gears and focus on how to address any wear or damage your pavers may experience over time.

Repairing Damaged Pavers

Repairing paver stones

Damaged pavers can seamlessly disrupt the aesthetic of an otherwise pristine driveway, and it's essential to act swiftly before these minor issues evolve into major headaches. The first step is understanding how to identify the damage accurately. Conduct regular inspections, preferably twice a year, and look closely for signs like cracks, chips, or shifting. Even a small crack can allow water infiltration, freezing in colder months and expanding, leading to larger fissures.

With this understanding in place, let's explore the steps you can take to repair those pesky pavers yourself.

Identifying the Damage

When inspecting your driveway, examine each paver with a discerning eye. A clean surface will help you spot issues more easily. Use a simple utility tool—like a small screwdriver—to prod areas around existing cracks; if they feel loose or unstable, it’s time for action. By catching these problems early on, you can prevent not only aesthetic issues but also functional ones that could affect drainage and weight distribution across your driveway.

Once you've identified damage, many repairs can be tackled without needing professional assistance.

DIY Repairs

For minor damage such as chips or small cracks, you often don’t need extensive tools or supplies. Start by gently removing the affected paver from the surrounding area. This may require a bit of elbow grease—if it's stubbornly stuck, use a flat putty knife around its seams. Fill the space beneath with fresh polymeric sand (which keeps weeds at bay) and carefully replace the paver. Ensure it's level with adjacent ones by tapping it down with a rubber mallet. The key is ensuring everything fits snugly without shifting.

However, not all situations are so straightforward.

Professional Help

If you find substantial damage—like entire sections that have settled too much or large cracks forming—consulting professionals is wise. Services like those offered at AZ Clean and Seal specialize in assessing situations beyond typical DIY fixes. They possess both experience and equipment necessary for more complex repairs, ensuring your driveway's longevity and appearance are restored effectively.

After successfully repairing damaged pavers, focusing on regular maintenance becomes essential in preventing the recurrence of these issues.

Developing a Maintenance Schedule

A well-thought-out maintenance schedule can significantly extend the lifespan of your pavers while enhancing their appearance. Think of it as an annual check-up for your driveway or patio; just as we get regular medical examinations, our outdoor spaces deserve the same attention. Establishing monthly, quarterly, and annual tasks helps create a rhythm that will ensure you remember each critical step required for effective maintenance.

Monthly Tasks

To keep your pavers at their best, some tasks are simple enough to implement every month. Start by sweeping the surface to remove debris; this small action keeps dirt from settling in or attracting weeds.

Every month, it’s crucial to check for weed growth; pulling unwanted plants out by hand is often the most effective method. This not only keeps your pavers looking well-kept but also ensures that roots do not disturb your stones' positioning over time.

While you're performing these tasks, take a moment to inspect for any visible damage. Look for cracks or shifting stones because catching these issues early can make a world of difference down the line.

Quarterly Tasks

As the seasons change, so should your approach to maintaining your pavers. Every three months, dedicate some time to thorough cleaning using a garden hose equipped with a high-pressure attachment. Water can work wonders when it comes to removing grime that discolors stones while being gentle enough not to cause damage.

This is also the perfect opportunity to reapply polymeric sand in the joints between your pavers if necessary. This sand helps prevent soil erosion beneath and deters weed growth, acting as a barrier against nature's persistent plants.

Annual Tasks

Finally, once a year, consider investing in deep cleaning through power washing; this thorough treatment can rejuvenate aging pavers and restore vibrancy lost to time. It’s almost reminiscent of spring cleaning—a chance to refresh everything.

Don't forget to apply paver sealant as well. This step offers an additional layer of protection against moisture damage and staining from oil or other spills. Keeping paver surfaces sealed enhances their resilience to harsh weather conditions too.

Be sure also to conduct a detailed inspection during this time. Look closely at any shifts or cracks that may have developed, and address repairs promptly to avoid escalating problems.

Keeping this regular schedule can save time and money in the long run; proactive care has always been more efficient than reactive repairs when addressing potential issues with your beautiful investment in outdoor aesthetics.

In summary, following a structured maintenance routine will not only preserve the beauty of your paved surfaces but also extend their life significantly. By incorporating these practices into your routine, you can enjoy a stunning and durable driveway or patio for years to come.

How to Clean Pavers Before Sealing: A Step-by-Step Guide for DIY Maintenance

Cleaning your pavers before sealing them is key to preserving their look and function. It involves using general cleaning supplies - a broom, garden hose, mild detergent or a recommended paver-cleaning solution, a scrub brush, and perhaps a leaf blower for larger outdoor areas. This cleaning regime may seem like a basic chore, but it is your first defense against wear and tear. However, there's more than meets the eye when it comes to this seemingly simple process. Now let's delve into the nitty-gritty of this task.

To clean pavers before sealing, start by removing any obstructions and covering nearby landscaping. Next, clear out moss and weeds, then saturate the paver surface with water. After that, mix a mild cleaning solution and scrub the pavers before rinsing away the cleaning solution and allowing the pavers to dry. Finally, re-sand the pavers and apply the paver sealer starting at the edges. Remember to follow manufacturer instructions for best results.

How to clean pavers before sealing

General Paver Cleaning Requirements

When it comes to paver maintenance, having a few basic tools and supplies can make all the difference in achieving a good clean. These include a broom for daily debris removal, a garden hose for wetting the surface, mild detergent or specific paver cleaning solution for scrubbing, a sturdy scrub brush for removing tough stains, and for larger areas, a leaf blower can be handy for quicker surface clearing.

If you're aiming for a thorough clean before applying sealant, these supplies will help you achieve just that. The broom is your trusty companion for the routine task of sweeping away everyday dirt and debris to keep your pavers looking neat and prevent any buildup over time. Next, the garden hose is perfect for gently wetting the paver surface, preparing it for cleaning without causing any damage to the material.

The Importance of Mild Detergent or Specific Paver Cleaning Solution

Now, let’s talk about the mild detergent or specific paver cleaning solution. This is crucial as the kind of cleaner you use is essential to protect the pavers from being damaged during cleaning. It's important to follow the manufacturer's recommendations when selecting a cleaning solution to avoid using harsh chemicals that could potentially harm the pavers. This will ensure that your pavers receive a thorough yet safe cleaning to remove any built-up grime without negatively impacting their appearance or integrity.

Scrub Brush - Your Stalwart Cleaning Tool

While simple dirt might come off with a light sweep or hose-down, stubborn stains require some extra muscle. This is where a sturdy scrub brush comes into play. Its firm bristles help loosen and lift those problematic spots without damaging the paver surface. Just like carefully scrubbing away at a stubborn stain on clothing, the gentle yet persistent action of the scrub brush will work wonders in revitalizing your pavers.

Tackling Larger Areas with Ease

For larger areas, investing in a leaf blower can significantly ease your efforts by quickly clearing away loose debris and leaves before proceeding with wet cleaning. Its powerful gusts of wind not only save you valuable time but also ensure that the surface is clean and dry before applying any solutions or sealants.

With these essential tools at hand, you are well-prepared to embark on the journey of maintaining your pavers through proper and thorough cleaning—a vital step in the process of preserving their beauty and longevity.

As you gear up to maintain your pavers, understanding the do's and don'ts of cleaning will further elevate your DIY maintenance skills.

Do's And Don'ts Of Cleaning Your Pavers

When it comes to cleaning your pavers, understanding what you should and shouldn't do is crucial to avoid potential damage and achieve a thorough, safe clean. Let's start with the Do's.

Do's

  1. Use a Mild Cleaning Solution: It's important to use a mild cleaning solution that is gentle on your pavers but effective in removing dirt and stains. A mixture of water and a mild detergent or specially formulated paver cleaner can work wonders without causing any harm to the surface.

  2. Test a Small Area First: Before fully committing to the cleaning process, always test a small, inconspicuous area first. This allows you to see how the pavers react to the cleaning solution and ensure there are no adverse effects.

  3. Use a Pressure Washer at a Low Setting if Required: A pressure washer can be an excellent tool for cleaning pavers, especially for stubborn dirt and grime. However, it's crucial to use it at a low setting to prevent any damage to the paver surface. The high-pressure setting can erode the sand between the pavers, leading to structural issues over time.

Now, let's move on to the Don'ts.

Don'ts

  1. Don't Use Harsh Chemicals: Avoid using harsh chemicals, acidic cleaners like vinegar, or bleach on your pavers. These can cause discoloration, damage the sealer (if present), and harm surrounding plants and grass.

  2. Don't Allow Cleaning Solutions to Dry on the Surface: Leaving cleaning solutions to dry on the paver surface can leave behind residue and streaks. Always rinse thoroughly after cleaning to ensure a pristine finish without any trace of chemicals.

  3. Don't Use Metal Brushes that Can Scratch the Pavers: While metal brushes may seem effective for tough stains, they can leave scratches and damage the surface of your pavers. Instead, opt for a stiff bristle brush for stubborn stains without risking harm to the pavers.

By following these do's and don'ts, you'll be well-equipped to clean your pavers effectively while maintaining their integrity and appearance for years to come.

Initial Steps: Removing Surface Dirt

Imagine looking out at your beautiful patio or driveway and seeing layers of dirt and leaves on the pavers. It doesn't quite give the impression you're aiming for, does it? That's why it's essential to start by sweeping away any loose dirt, leaves, or debris. This may seem like a tedious task, but trust me, it sets the stage for the more thorough cleaning process to come. The best part is that it's a simple step that can make a big difference.

Sweeping ensures that larger particles and debris are removed, preventing them from interfering with the next steps in the cleaning process. When you leave this debris on the surface and start applying water or cleaning solutions, it can create an even bigger mess by turning into mud or getting ground into the pavers. You don't want that, do you?

For larger areas such as expansive driveways or patios, a leaf blower can be an efficient tool to remove loose debris. It might just become your new favorite outdoor cleaning tool!

Focusing on removing surface dirt before moving on to deeper cleaning not only makes the job easier but also ensures a cleaner finish in the end.

Remember, it's all about setting the stage for success. By starting with a clean slate, you'll make every subsequent step more straightforward and effective without dealing with unnecessary obstacles along the way.

So there you have it, the first crucial step in the process - clearing off that unwanted surface layer of grime to lay the groundwork for a thorough clean. And trust me, when you see those pavers sparkling after sealing, you'll know it was worth it!

Intermediate Steps: Eliminating Weeds and Mold